My goal for today is to be able to control a strip of NeoPixel LEDs using the Raspberry Pi Pico.
I found the NeoPixel LEDs post on Adafruit’s website that seems to be exactly what I want to do.
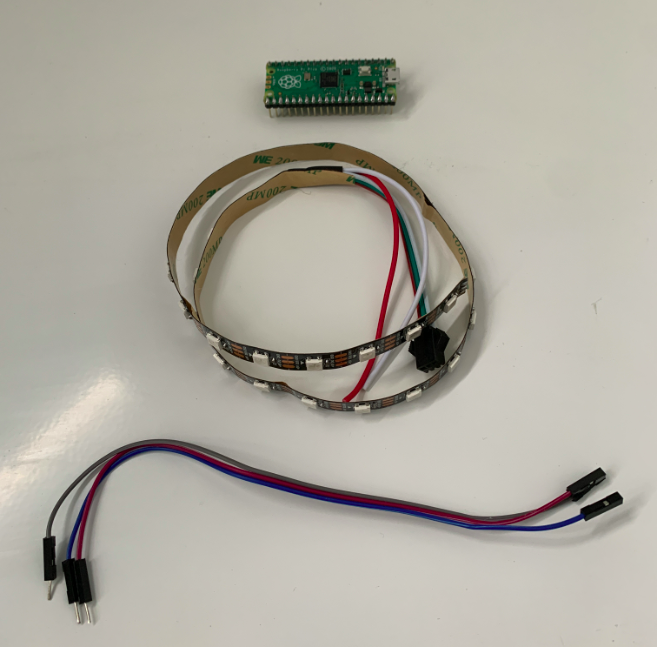
The first thing I did was cut my LED strip to the correct size (30 LEDs) and grabbed some wires to let me control the strip to the header pins on the Pico.
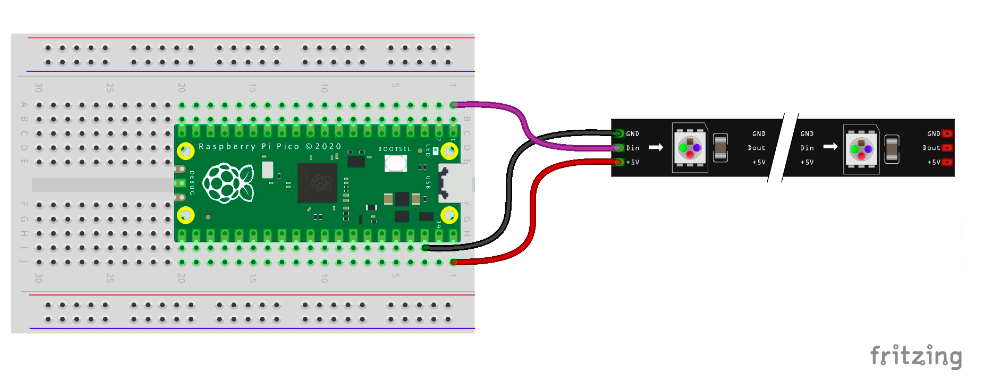
Wiring the NeoPixel LED Strip
I wired everything up as follows:
Installing the Adafruit CircuitPython NeoPixel Library
Once that was done, I downloaded CircuitPython for the Pico. This was a UF2 file. I held down the BOOTSEL button on the Pico before plugging it into my laptop. This brought it up as a drive labelled RPI-RP2. I dragged the UF2 file to the new drive. After a couple of seconds, it reappeared with the name CIRCUITPY. Apparently this means CircuitPython is successfully installed 🎉.
The next step was to download the necessary library to use the NeoPixels. I copied the neopixel.mpy file to the lib directory as instructed by the docs. I then replaced the contents of the code.py file with the following:
# SPDX-FileCopyrightText: 2021 Kattni Rembor for Adafruit Industries
#
# SPDX-License-Identifier: MIT
"""
NeoPixel example for Pico. Turns the NeoPixels red.
REQUIRED HARDWARE:
* RGB NeoPixel LEDs connected to pin GP0.
"""
import board
import neopixel
# Update this to match the number of NeoPixel LEDs connected to your board.
num_pixels = 30
pixels = neopixel.NeoPixel(board.GP0, num_pixels)
pixels.brightness = 0.5
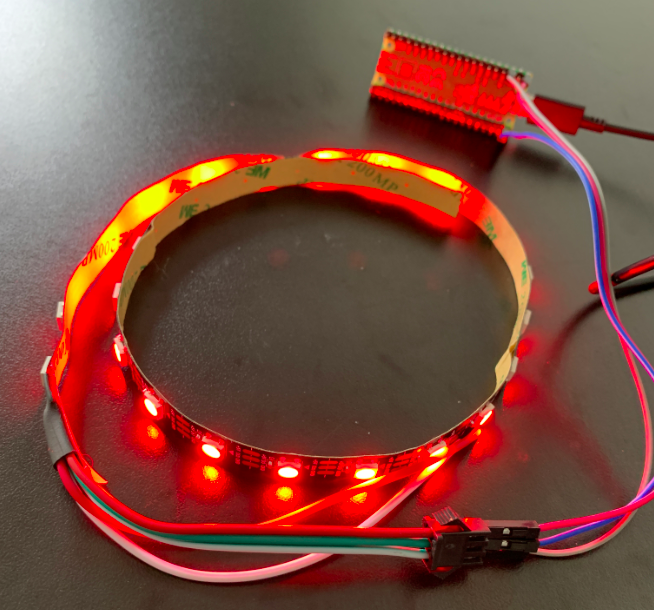
while True:
pixels.fill((255, 0, 0))
I wasn’t really expecting anything to happen but after saving the file, to my surprise:

Even at 50%, these things are bright.
Reference: Adafruit CircuitPython NeoPixel
Animations
The next thing I want to look at is creating some animations based around the blue and pink colour scheme my brother likes.
This looks like a good place to start: CircuitPython LED Animations